
📑 Table of Contents ▶
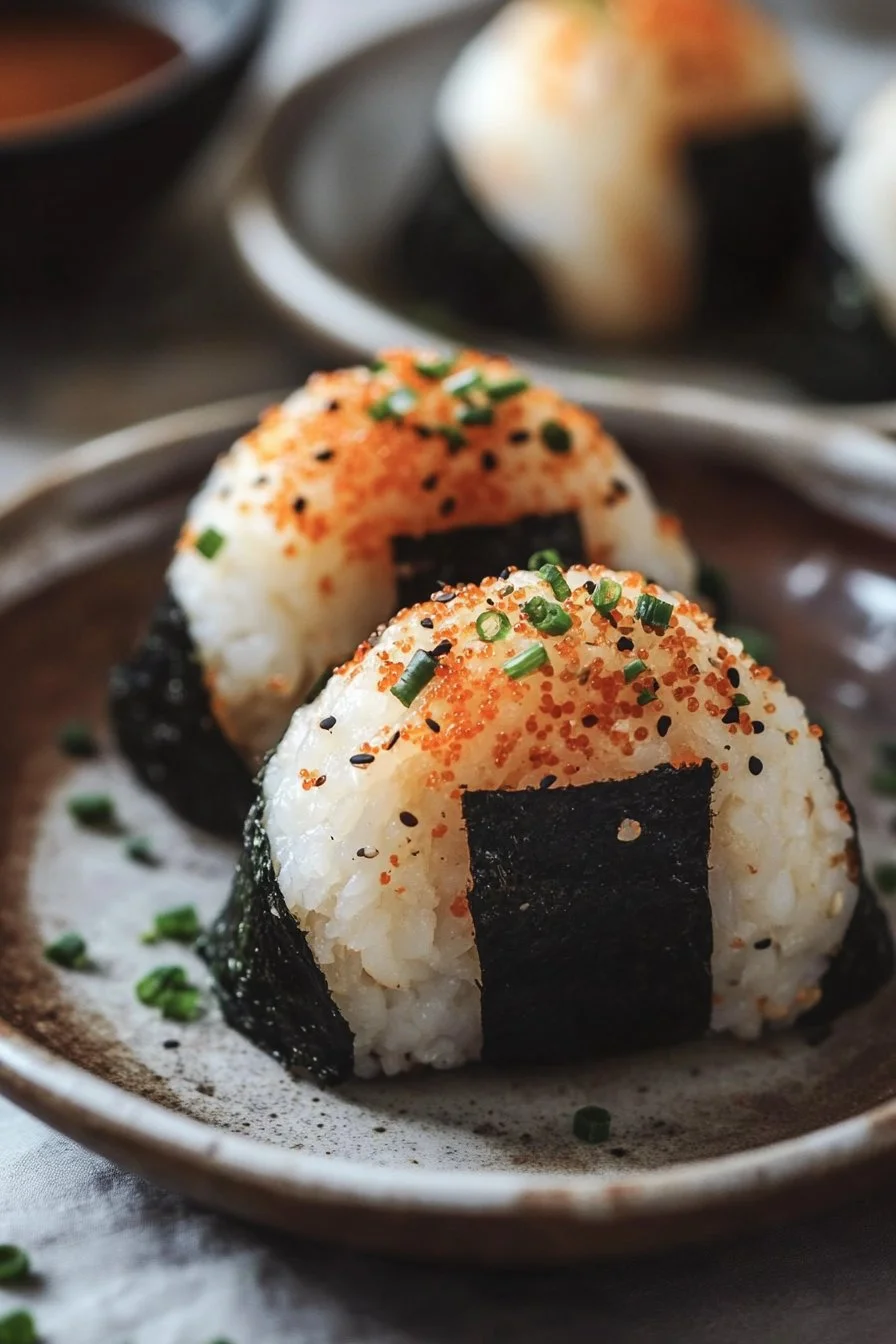
Spicy Tuna Rice Ball
Creating a delicious Spicy Tuna Rice Ball often takes me back to my childhood when I enjoyed Japanese cuisine with my family. The combination of flavors and textures in each bite brings comfort and familiar warmth. Sushi rice, with its sticky and tender qualities, perfectly cradles savory fillings like tuna mixed with zesty Kewpie mayo and sriracha. This dish brings a delightful balance of flavors that excites the palate.
I love how versatile a Spicy Tuna Rice Ball can be. You can shape it in various forms—triangles or balls—which always makes it fun to eat. Preparing this dish allows me to be creative in the kitchen while providing a nutritious snack or meal option for my family. Whether packing it for lunch or having it as a quick snack at home, Spicy Tuna Rice Ball never fails to satisfy.
These rice balls are ideal for busy days. They come together quickly with simple ingredients you might already have in your pantry. Plus, the added touch of nori and optional toppings like sesame seeds and green onions elevate the entire experience. They are a great example of how you can create something delicious without fuss!
Part 1 — Creating Your Flavorful Rice Ball
Fundamentals
The foundation of any great Spicy Tuna Rice Ball lies in the rice itself. For this recipe, sushi rice provides the perfect base due to its sticky nature once cooked. The rice clings together, making it easy to shape into balls or triangles filled with tasty tuna.
Choosing the right ingredients for your filling is just as essential. Canned tuna makes this dish accessible and gives a flavor-packed punch when mixed with Kewpie mayo and sriracha. Each bite bursts with delectable flavor that keeps you coming back for more.
Preparation/Setup
Preparation is straightforward. Start by rinsing your sushi rice under cold water until it runs clear. This step removes excess starch, ensuring your rice cooks perfectly without turning gummy. Cooking your rice in a rice cooker or pot with the right amount of water results in a fluffy texture ideal for shaping.
After cooking, let the rice cool slightly. The cooling allows you to handle the rice easier, preventing burns on your hands when forming the rice balls. Always wet your hands before shaping the rice to prevent sticking, making the process smoother and more enjoyable.
Ingredients
To make these tasty rice balls, gather the following ingredients:
- 2 cups sushi rice
- 2 ½ cups water
- 1 can tuna, drained
- ¼ cup Kewpie mayo
- 1 tbsp sriracha (adjust to taste)
- Salt, to taste
- Nori sheets
- Sesame seeds (optional)
- Green onions, chopped (optional)
Directions
- Rinse the sushi rice under cold water until the water runs clear to remove excess starch.
- Cook the rice in a rice cooker or pot with 2 ½ cups of water. Once cooked, let it cool slightly.
- In a bowl, mix the drained tuna with Kewpie mayo and sriracha. Adjust the sriracha based on your preference for spice. Season with salt to taste.
- Wet your hands to prevent sticking. Take a small portion of rice and flatten it in your palm.
- Place a spoonful of the tuna mixture in the center of the flattened rice and shape the rice around it, forming a triangle or ball.
- Wrap each onigiri with a strip of nori.
- Optionally, sprinkle with sesame seeds and chopped green onions. Serve as a snack or meal.
Part 2 — Mastering Technique and Skills
Technique
Mastering the technique for shaping your Spicy Tuna Rice Balls can make a significant difference in presentation and taste. Once you have your rice and filling prepared, take a small portion of rice and flatten it in your hand. This step is crucial; it creates a sturdy base to hold the filling securely.
As you roll the rice around the tuna filling, compress it gently but firmly enough to keep the shape. The goal is to create a cohesive unit that holds together while still being easy to bite into. Experimenting with pressure levels helps find the perfect balance.
Tips/Tricks
Struggling with the sticking rice? Wetting your hands is a game-changer! It significantly reduces sticking and makes the shaping process seamless. If you’re in the mood for different shapes or sizes, adjust the rice portion accordingly to create smaller or larger rice balls as you desire.
Additionally, consider adding different spices or ingredients to your tuna mixture. Mixing in finely chopped vegetables or switching up the mayo can add unique twists to your rice balls. Don’t shy away from creativity in the kitchen!
Part 3 — Perfecting Results
Perfecting Results
Perfecting the texture of your Spicy Tuna Rice Ball comes with practice. Ensure you don’t overcook the sushi rice — cook according to package instructions, cooling it slightly after. The right rice consistency is crucial to preventing crumbs during shaping.
Moreover, adjusting your filling ingredients can help enhance the flavor. Taste the tuna mixture before wrapping to ensure it’s seasoned just to your liking. The balance between the tuna, mayo, and sriracha is key for that satisfying flavor combination.
Troubleshooting/Variations
If your rice balls fall apart during cooking, check the moisture level in your products. Insufficient moisture can lead to crumbly results, while too much can cause overly sticky texture. Experimenting with the water ratios or letting the rice cool for an extra few minutes often solves any issues.
Variations could include using different proteins, like crab or salmon, in lieu of tuna. You can also customize spice levels by adding more or less sriracha. The versatility of the Spicy Tuna Rice Ball makes it easy to adapt based on personal preferences.
Part 4 — Serving and Storage
Serving/Presentation
Serving your Spicy Tuna Rice Balls can be an exciting event. Present them on a colorful platter and cut the nori strips into engaging shapes. The vibrant colors of green onions and sesame seeds brighten the dish, making it appealing to the eye and tempting to the taste buds.
Consider pairing these rice balls with a light dipping sauce or serving them alongside edamame for a complete meal. The texture and flavors work wonderfully together, creating a satisfying eating experience.
Pairings/Storage
Although rice balls generally stand well on their own, they can be paired with a variety of light sides such as salads or miso soup. Storing any leftovers is easy; simply place them in an airtight container in the fridge. They can last for a couple of days, making them perfect for meal prep or snacks.
If you wish to freeze them, wrap each rice ball individually in plastic wrap and place them in a freezer-safe bag. Reheat them gently in the microwave when you’re ready to enjoy them again. These rice balls offer endless flexibility for quick meals.
In creating Spicy Tuna Rice Balls, you embrace both culinary creativity and comfort food nostalgia. Enjoy the process, and don’t hesitate to share your delicious creations with family and friends!
Print
Spicy Tuna Rice Ball
- Prep Time: 15 minutes
- Cook Time: 20 minutes
- Total Time: 35 minutes
- Yield: 4 servings
- Category: Snack
- Method: Cooking
- Cuisine: Japanese
- Diet: Pescatarian
Description
Delicious and versatile Spicy Tuna Rice Balls made with sushi rice and a zesty tuna filling, perfect for snacks or meals.
Ingredients
- 2 cups sushi rice
- 2 ½ cups water
- 1 can tuna, drained
- ¼ cup Kewpie mayo
- 1 tbsp sriracha (adjust to taste)
- Salt, to taste
- Nori sheets
- Sesame seeds (optional)
- Green onions, chopped (optional)
Instructions
- Rinse the sushi rice under cold water until the water runs clear to remove excess starch.
- Cook the rice in a rice cooker or pot with 2 ½ cups of water. Once cooked, let it cool slightly.
- In a bowl, mix the drained tuna with Kewpie mayo and sriracha. Adjust the sriracha based on your preference for spice. Season with salt to taste.
- Wet your hands to prevent sticking. Take a small portion of rice and flatten it in your palm.
- Place a spoonful of the tuna mixture in the center of the flattened rice and shape the rice around it, forming a triangle or ball.
- Wrap each onigiri with a strip of nori.
- Optionally, sprinkle with sesame seeds and chopped green onions. Serve as a snack or meal.
Notes
To prevent sticking, always wet your hands while shaping the rice. Feel free to customize the filling with different spices or proteins.