📑 Table of Contents ▶
Gordon Ramsay’s Tuna Cakes
Cooking is often a journey filled with flavors, memories, and shared moments. Tuna cakes hold a special place in this journey. They remind me of family gatherings, where crispy bites of tuna patties brought everyone together. The nostalgic aroma of frying in the kitchen conjures up a sense of comfort and warmth, something everyone craves.
Gordon Ramsay’s tuna cakes capture that essence beautifully. With each bite, you experience a delightful symphony of flavors that can brighten up any mealtime, transforming ordinary fish into extraordinary treats. The addition of fresh ingredients like green onions and parsley elevates these cakes, making them not only tasty but appealing to the eye.
These tuna cakes offer a wonderful solution for busy weeknights or leisurely weekends. They combine convenience and nutrition, using pantry staples like canned tuna. As a busy mom, I appreciate meals that require minimal prep but deliver maximum flavor.
Let’s dive into the details of crafting these delicious tuna cakes, a dish that combines joy, health, and simplicity.
The Essence of Gordon Ramsay’s Tuna Cakes
Fundamentals
Creating Gordon Ramsay’s tuna cakes begins with understanding how each ingredient contributes to the overall flavor and texture. Tuna serves as the foundation, offering protein and a slightly briny taste. Fresh herbs like parsley and green onion add brightness, while the combination of Old Bay seasoning and garlic powder enhances the cakes with layers of flavor. The panko breadcrumbs provide that necessary crunch, making every bite satisfying.
Using fresh ingredients is key in achieving the best results. The aromatic properties of fresh parsley bring a lightness that dried options can sometimes lack. Meanwhile, the Old Bay seasoning imparts a classic seafood taste, perfect for tuna, balancing the flavors beautifully.
Understanding the fundamentals allows us to appreciate the synergistic relationship of the ingredients. With set fundamentals in mind, let’s explore how to prepare these delightful cakes step-by-step.
Preparation/setup
Before diving into preparation, gather all the necessary tools and ingredients. You’ll need a large mixing bowl for combining the ingredients, a fork for flaking the tuna, and a frying pan for cooking the patties.
Start by draining the tuna well, ensuring no excess liquid remains. This step is essential because too much liquid will result in soggy cakes. Flake the tuna with a fork, breaking it into smaller pieces. This ensures an even mix and allows the flavors to blend better during cooking.
Next, chop the green onion and parsley if you’re using fresh herbs. Place these in the mixing bowl along with the flaked tuna. Grate the Old Bay seasoning and garlic powder into the bowl, seasoning the mix well. Measure out the kosher salt and add it next.
Incorporating panko or coarse breadcrumbs is vital in creating texture. This step brings a delightful crunch to the final product. Finally, add the Dijon mustard, mayo, and eggs, binding all the ingredients together.
Avoid overmixing; gently combine everything until just combined. The goal is to keep the patties tender while ensuring all ingredients blend.
Ingredients
- 3 cans tuna, drained
- 2 tbsp fresh parsley (or 1 tbsp dried)
- 1 green onion, minced
- 1 tsp Old Bay seasoning
- ½ tsp garlic powder
- ½ tsp kosher salt
- 75g panko or coarse breadcrumbs
- 2 tbsp Dijon mustard
- 2 tbsp mayo
- 2 eggs
- 2 tbsp olive oil (for frying)
Directions
- Start by draining the tuna well, ensuring no excess liquid remains.
- Flake the tuna with a fork before transferring it to a large mixing bowl.
- Add in the minced green onion, parsley, Old Bay seasoning, garlic powder, kosher salt, panko breadcrumbs, Dijon mustard, mayo, and eggs.
- Gently mix all the ingredients until just combined. Avoid overmixing to keep the patties tender.
- For shaping, scoop a generous ⅓ cup of the mixture and form it into 8 patties.
- If time allows, chill them in the fridge for 15 minutes prior to cooking; this helps firm them up.
- Heat the olive oil in a pan over medium-high heat.
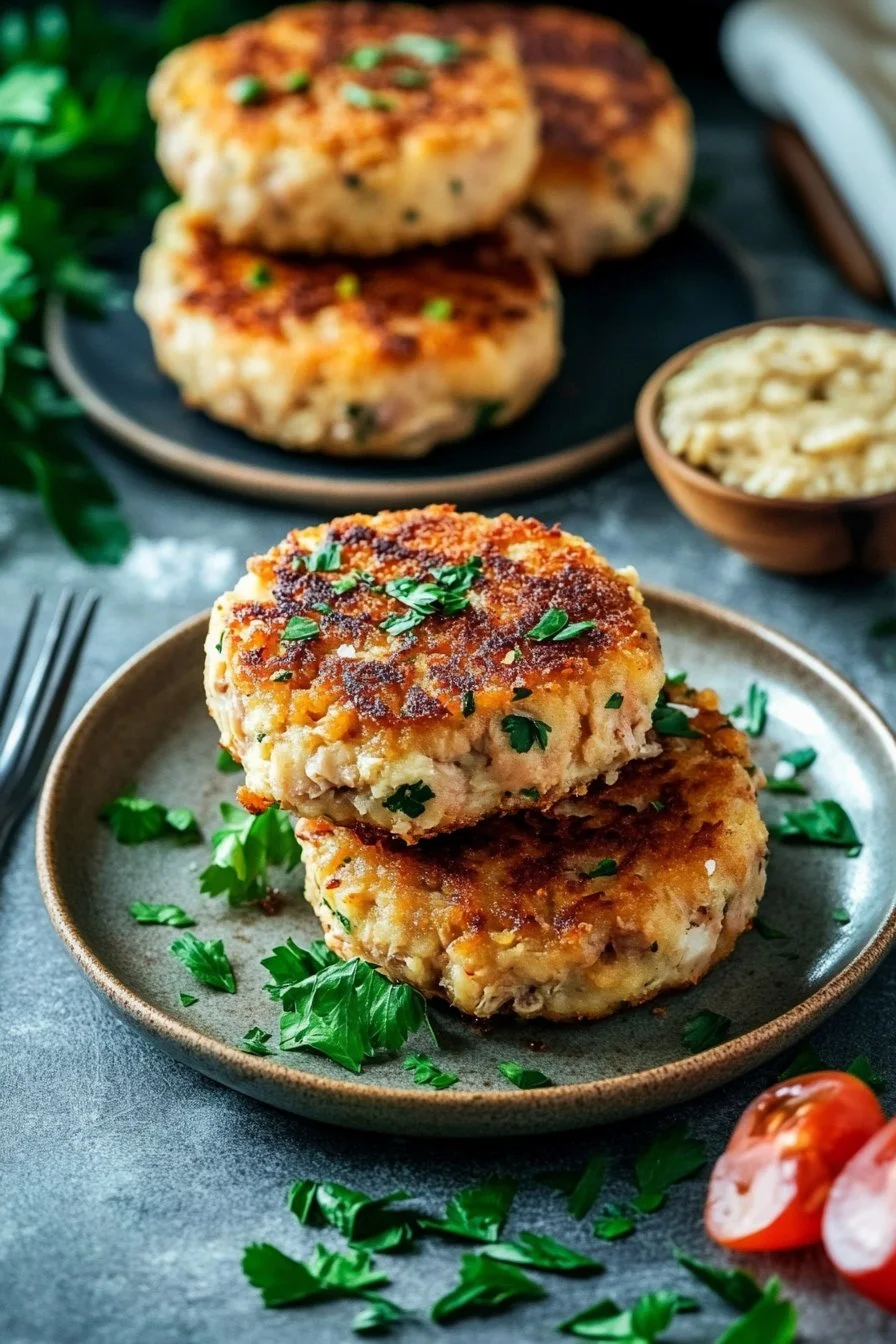
- Cook the patties for 4–5 minutes on each side until they turn golden brown and crispy.
- Remember not to overcrowd the pan; work in batches if necessary to ensure even cooking.
Unleashing the Technique Behind Tuna Cakes
Technique
Perfecting Gordon Ramsay’s tuna cakes requires a few essential techniques to ensure that they emerge crispy on the outside and tender on the inside. One key technique involves chilling the formed patties before cooking. This extra step firms them up, preventing them from breaking apart during frying.
Additionally, managing the oil temperature while cooking is critical. Preheat the oil to the right temperature to avoid soggy patties. If the oil is too hot, the outside may burn, leaving the inside undercooked. Conversely, oil that’s not hot enough can lead to greasy cakes.
Working in batches during frying also contributes to a perfectly cooked patty. This technique ensures that each one gets adequate heat and space, resulting in an even golden-brown crust.
Tips/Tricks
Here are some useful tips to help you achieve exemplary results:
- Use fresh herbs whenever possible. They add brightness and enhance flavor significantly.
- Incorporate different spices if you wish to customize the flavor, such as lemon zest for added brightness.
- For an extra crispy exterior, consider adding more panko breadcrumbs or a light dusting before frying.
- Don’t skip the chilling step—it’s essential for achieving that satisfying texture.
Experimenting with these techniques can lead to incredible variations, making each batch of tuna cakes slightly different yet equally delicious.
Variations and Perfecting Results
Perfecting Results
Striving for perfection in Gordon Ramsay’s tuna cakes can lead to delightful variations. If you prefer a spicier kick, adding diced jalapeños or some chopped red pepper can elevate your patties. Similarly, incorporating crushed red pepper can add an enticing warmth.
To achieve different textures, try using a combination of panko and crushed crackers. This adjustment will create a unique crunch that diversifies the eating experience.
Adjusting cooking times can also affect the final results. If you like a deeper golden color, increase the cooking time slightly but remains vigilant to avoid burning.
Troubleshooting/variations
If your cakes fall apart during cooking, it often points to excess moisture in the mixture. To address this, gradually increase the breadcrumbs until the mixture holds together better. Conversely, if the cakes taste bland, revisiting the seasoning can boost the flavor immensely. A pinch of salt or a sprinkle of Old Bay seasoning can take them to another level.
When serving, consider pairing them with different sauces such as a homemade tartar sauce or a spicy aioli. These can amplify the flavors and complement the tuna cakes perfectly.
Serving and Storing Tuna Cakes
Serving/presentation
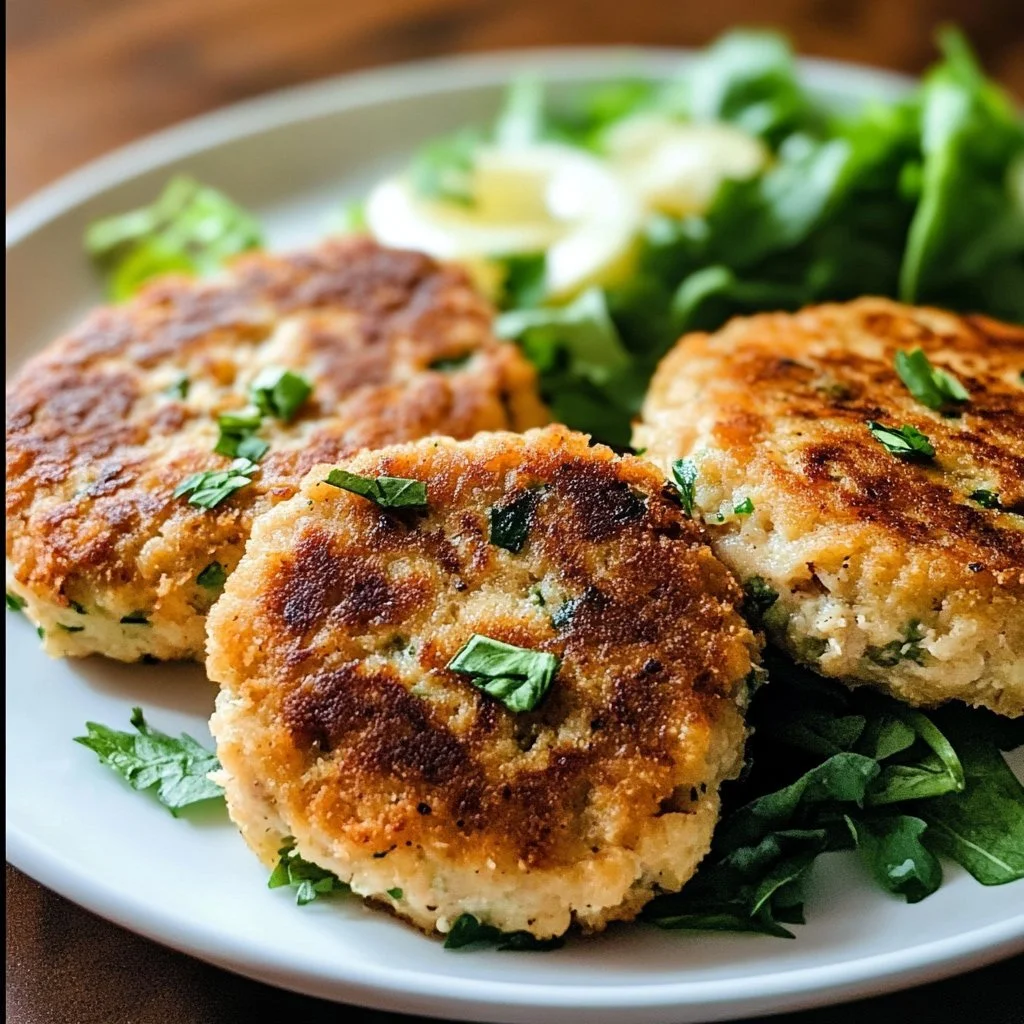
Presenting Gordon Ramsay’s tuna cakes can be as creative as they are delicious. Serving them warm on a bed of mixed greens creates an appealing dish that’s both healthy and vibrant.
Consider garnishing with fresh lemon wedges to add a zesty touch. The acidity of lemon can balance the richness of the tuna cakes and brightens the overall taste.
Plating the cakes with a drizzle of sauce, or salsa adds visual appeal. This approach makes a simple dish presentable and perfect for gatherings.
Pairings/storage
While the tuna cakes shine on their own, they can complement a wide range of sides. Serving them with a fresh salad or steamed vegetables provides a balance of textures and flavors.
Store leftover tuna cakes in an airtight container in the refrigerator for up to three days. They reheat well in the oven to maintain their crispiness.
For longer storage, consider freezing them. Wrap them individually in plastic wrap, then store in a freezer-safe bag. Freezing extends their shelf life for up to three months, making for a quick and easy meal any time.
Conclusion
Gordon Ramsay’s tuna cakes represent the perfect integration of flavor, simplicity, and creativity. Each step, from draining the tuna to frying the patties, plays a role in creating a deliciously crispy and satisfying meal. By following the outlined techniques and exploring variations, anyone can craft these delightful bites that bring comfort and joy to any table. Enjoy them fresh or pack them for later, and savor the incredible taste of tuna cakes whenever you choose.
Print
Gordon Ramsay’s Tuna Cakes
- Prep Time: 15 minutes
- Cook Time: 10 minutes
- Total Time: 25 minutes
- Yield: 4 servings
- Category: Main Course
- Method: Frying
- Cuisine: American
- Diet: Pescatarian
Description
Deliciously crispy and tender tuna cakes made with fresh ingredients and packed with flavor, perfect for any mealtime.
Ingredients
- 3 cans tuna, drained
- 2 tbsp fresh parsley (or 1 tbsp dried)
- 1 green onion, minced
- 1 tsp Old Bay seasoning
- ½ tsp garlic powder
- ½ tsp kosher salt
- 75g panko or coarse breadcrumbs
- 2 tbsp Dijon mustard
- 2 tbsp mayo
- 2 eggs
- 2 tbsp olive oil (for frying)
Instructions
- Drain the tuna well to remove excess liquid.
- Flake the tuna with a fork and transfer to a large mixing bowl.
- Add minced green onion, parsley, Old Bay seasoning, garlic powder, kosher salt, panko breadcrumbs, Dijon mustard, mayo, and eggs.
- Gently mix all the ingredients until just combined, taking care not to overmix.
- Scoop a generous ⅓ cup of the mixture and form into 8 patties.
- If time permits, chill the patties in the fridge for 15 minutes.
- Heat olive oil in a pan over medium-high heat.
- Cook patties for 4-5 minutes on each side until golden brown and crispy.
- Work in batches if necessary to avoid overcrowding the pan.
Notes
Use fresh herbs for the best flavor. Chilling the patties before frying helps them maintain their shape.