➤ Table of Contents
As a mom juggling a packed schedule, I often find myself searching for ways to make meals that are both quick and delicious. Enter the air fryer—a revolutionary kitchen gadget that has completely transformed how I cook my favorite comfort foods. The air fryer blooming onion is one of those irresistible treats that has become a staple in my household.
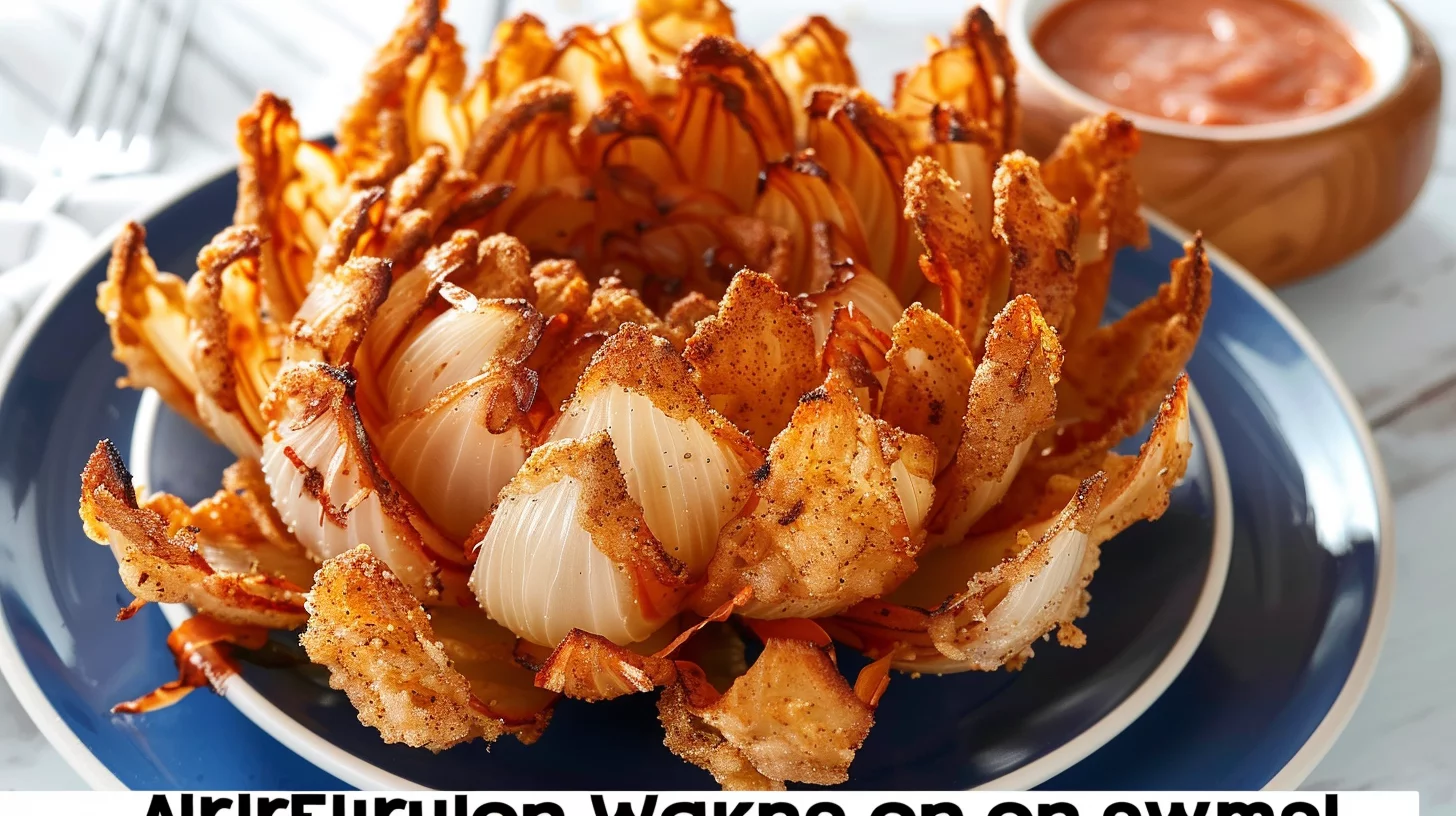
Picture this: a golden, crispy blooming onion that tastes just like the deep-fried version but without the guilt of excess oil. The first time I made an air fryer blooming onion, I was amazed by how easy it was to achieve that perfect crunch. My family was equally impressed, and it quickly became a requested favorite.
What makes the air fryer blooming onion so special is the combination of simplicity and flavor. With just a few ingredients, you can create a dish that looks indulgent and feels light. The key to this magic lies in the air fryer itself, which allows you to enjoy crispy textures without the need for deep frying.
In this guide, I’ll walk you through the process of making an air fryer blooming onion, sharing tips and tricks I’ve learned along the way. Get ready to transform your cooking experience and delight your taste buds with this delightful dish.
Print
Air Fryer Blooming Onion
- Prep Time: 20 minutes
- Cook Time: 20 minutes
- Total Time: 40 minutes
- Yield: 1 blooming onion
- Category: Appetizer
- Method: Air Frying
- Cuisine: American
Description
Learn how to make a delicious and crispy Air Fryer Blooming Onion with this easy recipe. Perfect for a tasty appetizer or snack!
Ingredients
- 1 large sweet onion (200g)
- 1/2 cup all-purpose flour (60g)
- 1 teaspoon garlic powder (5g)
- 1 teaspoon onion powder (5g)
- 1/2 teaspoon paprika (2.5g)
- 1/2 teaspoon Italian seasoning (2.5g)
- 1/2 teaspoon salt (2.5g)
- 1/4 teaspoon chili powder (1.25g)
- 1/4 teaspoon turmeric (1.25g)
- 1/4 teaspoon black pepper (1.25g)
- 1/2 cup milk (120ml)
- 1 large egg
- 2 tablespoons (30 ml) vegetable oil, melted
- 1 packet seasoned coating mix 2.5 ounces (70g)
- salt and pepper, optional
- blooming onion dipping sauce
- oil for spritzing
Instructions
- Begin by trimming half an inch from the onion’s top and removing its outer layer.
- Place the onion with the cut side facing down. About half an inch from the root, slice all the way through to the cutting board. Ensure your cuts converge in the center. Avoid slicing into the root or getting too close to it.
- Repeat this process to create four evenly spaced incisions around the onion.
- Make an extra slice between each section until there are eight equal cuts.
- Flip the onion over and leave it for five minutes so the sections can loosen.
- Before coating, use your fingers to gently prise apart the outer layers.
- Now that the onion is open, it’s time to coat it to achieve a crispy texture.
- If any sections are sticking together, carefully separate them so the onion fully “blooms.”
- Blend the flour and spices in a large bowl. In a separate small deep bowl, beat together the egg, butter, and milk.
- Place the onion in a sizable clean bowl, cut-side up and separated.
- Dust the flour mixture over the onion, ensuring you get it between the layers. Use a fork to sprinkle the mixture and your fingers to separate each layer and dust flour between each section.
- Pour any remaining flour over the entire onion. Allow it to rest for a few minutes.
- Turn the onion over and gently shake off the excess flour back into the bowl. Save the leftover flour. Ensure the flour covers the sections without leaving clumps between them.
- Transfer the onion into a large bowl and pour the egg mixture over it, ensuring an even coat. Pouring it over helps it reach between the layers and coat the flour.
- Open each section to ensure the egg mixture saturates all the flour between them. Allow the onion to sit in this mixture for a few minutes. Remove the onion from the bowl and let the excess drip away.
- Combine the packet of seasoned coating mix with the reserved flour. Position the wet onion in an empty bowl or on foil and sprinkle the reserved flour and coating mixture over it. Avoid sprinkling between the sections to facilitate spraying with cooking oil later. However, sprinkle the flour and breading mixture over all parts of the onion that are exposed. Brush more egg mixture on any drier parts to ensure thorough coverage.
- Place the onion in the fridge to set while you preheat the air fryer.
- Set the air fryer to 300°F to preheat.
- After ten minutes, take the onion out of the fridge and spray it generously with cooking oil. This step is crucial to achieve the “deep-fried” taste and texture. Ensure all visible flour is soaked with cooking oil. Check between the sections and spray any other flour spots you find.
- Place the onion on a piece of foil for easy removal after cooking.
- Air fry for 20 minutes or until it is crispy and golden brown. Open the fryer and spray with more cooking oil at least once during the cooking process.
- Carefully remove and serve with Blooming Onion Dipping Sauce.
Notes
- Separate each onion layer before coating for a fully bloomed look and crispy texture.
- Ensure to generously spray the onion with cooking oil for a deep-fried taste and texture.
- Check and spray any visible flour spots with oil for even browning while cooking.
Creating the Perfect Air Fryer Blooming Onion
Fundamentals
To make a successful air fryer blooming onion, start with a large sweet onion. This type of onion provides the perfect balance of sweetness and sharpness, which complements the crispy coating. The key to achieving the blooming effect lies in the preparation and slicing technique. Begin by trimming half an inch off the top and peeling away the outer layer. Place the onion cut-side down and make incisions around the onion, ensuring they converge in the center.
Once you’ve created the initial cuts, make additional slices between each section, resulting in eight equal cuts. This step is crucial for allowing the onion to “bloom” during cooking. Don’t forget to gently separate the outer layers to facilitate even coating and crispiness.
Preparation and Setup
With the onion prepared, it’s time to focus on the coating. Combine all-purpose flour with garlic powder, onion powder, paprika, Italian seasoning, salt, chili powder, turmeric, and black pepper in a large bowl. This flavorful mixture will form the base for your onion’s crispy exterior. In a separate bowl, beat together a large egg, melted vegetable oil, and milk. This wet mixture will help the flour adhere to the onion.
Place the onion in a clean bowl, cut-side up, and dust it with the flour mixture, ensuring you get flour between all layers. Shake off any excess and pour the egg mixture over the onion. Allow it to sit for a few minutes to ensure thorough saturation. Then, combine the leftover flour with a packet of seasoned coating mix and sprinkle it over the onion, creating a final layer of flavorful breading.
Mastering the Art of Air Frying
Technique
Preheat your air fryer to 300°F. This step ensures even cooking and helps achieve that perfect golden brown color. After the onion has chilled in the fridge for about ten minutes, spray it generously with cooking oil. This is crucial for achieving a “deep-fried” taste and texture. Place the onion on a piece of foil for easy removal after cooking and air fry it for 20 minutes. Spray with more cooking oil at least once during cooking to ensure all flour spots are well-coated.
For more tips on achieving the best results, check out air fryer crispy fried onions for additional insights into perfecting crispy onion dishes.
Tips and Tricks
To ensure every section of the onion is evenly coated, use a fork to sprinkle the flour mixture and your fingers to separate each layer. This attention to detail makes a significant difference in achieving a uniformly crispy texture. Additionally, don’t rush the soaking process in the egg mixture—allowing it to sit for a few minutes ensures better adhesion and flavor.
If you love experimenting with air fryer recipes, try air fryer onion rings for another delicious take on crispy onions.
Perfecting and Troubleshooting Your Blooming Onion
Perfecting Results
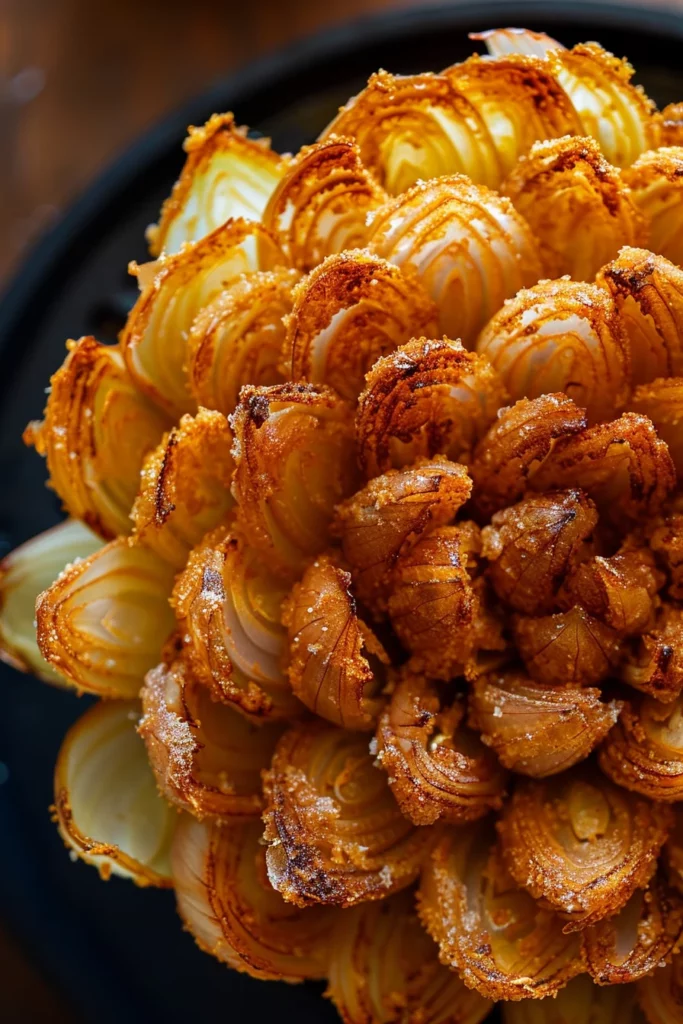
The key to a perfect air fryer blooming onion lies in achieving a crispy exterior while ensuring the inside remains tender. Keep a close eye on the cooking process and spray with oil as needed. This step helps prevent any dry spots and contributes to that sought-after crunch.
For more culinary inspiration, explore air fryer coconut shrimp to expand your air fryer repertoire with a seafood twist.
Troubleshooting and Variations
If you encounter any issues with uneven cooking or flour clumps, consider adjusting the slicing technique or the amount of cooking oil used. Properly separating the onion sections and ensuring thorough coating are key factors. Experiment with different spice blends or try adding a touch of heat with additional chili powder for a variation on the classic.
For even more ideas, check out air fryer roasted baby potatoes for a delicious side dish to pair with your blooming onion.
Serving and Storing Your Air Fryer Blooming Onion
Serving and Presentation
Once your air fryer blooming onion is perfectly crispy and golden, it’s time to serve. Present it alongside a delicious blooming onion dipping sauce for an extra burst of flavor. The visual appeal of a blooming onion makes it a show-stopping appetizer or side dish for any gathering.
If you’d like to explore more main dish options, consider pairing your blooming onion with air fryer lobster tails with garlic butter for an indulgent meal.
Pairings and Storage
When serving your blooming onion, consider pairing it with other air fryer favorites like air fryer roast beef for a hearty meal. To store leftovers, place them in an airtight container in the refrigerator. Reheat in the air fryer to restore crispiness before enjoying again.
Conclusion
The air fryer blooming onion is a testament to how simple ingredients and a clever cooking method can transform your dining experience. By mastering the art of air frying, you can enjoy a healthier version of a classic favorite without compromising on taste or texture. The versatility of the air fryer allows for endless culinary creativity, making it an essential tool in any kitchen.
Whether you’re a seasoned air fryer enthusiast or just beginning your journey, the air fryer blooming onion is a must-try. With its crispy exterior and tender inside, this dish will surely become a favorite in your household, offering a delightful balance of indulgence and health.