📑 Table of Contents ▶
Fried Oysters
The crispy delight of fried oysters brings back fond memories. As a child, I always looked forward to family beach trips where we indulged in fresh seafood. Fried oysters stood out among the many offerings, with their crunchy exterior and succulent interior leaving a lasting impression. The aroma of frying oysters wafting through the air was almost as delightful as the first bite.
With each oyster fried to golden perfection, my family gathered around the table, sharing laughter and stories. The combination of textures and flavors created a beloved tradition. Today, I cherish those moments and seek to recreate the joy of fried oysters at home, all while adding my personal twist to the recipe.
Fried oysters embody that wonderful feeling of comfort food. The process combines simple ingredients with technique that results in a dish that captures hearts and taste buds. Whether for a casual family dinner or an exciting gathering, this recipe brings the charm of seaside memories right to your kitchen.
Dive into this delectable recipe and discover how to master the art of frying oysters. Let’s ensure you’re equipped with everything you need to make your own crunchy, mouthwatering fried oysters.
The Joy of Fried Oysters
Fundamentals
Fried oysters shine in their simplicity. Begin with high-quality ingredients to ensure that the final dish is as flavorful as possible. Fresh oysters provide an oceanic taste while the crispy coating adds crunch and texture. This dish effortlessly combines flavors and textures that create a memorable dining experience.
The key to achieving delicious fried oysters lies in their preparation. Properly shucking and coating the oysters transforms these delicate seafood treasures into something extraordinary. Each step in the process elevates the dish, making it essential to follow the method closely for optimal results.
Preparation/setup
Start by gathering your ingredients and preheating your workspace. Position a sheet pan lined with a cooling rack near your frying station. This setup allows for ease of frying and helps drain excess oil from the oysters once they turn golden brown.
Prepare three shallow dishes: one with all-purpose flour seasoned with salt and pepper, another for the beaten eggs, and a last one for the crushed saltine crackers. This efficient assembly line will streamline the breading process, ensuring you can coat each oyster quickly and uniformly.
Ingredients
To make perfect fried oysters, you’ll need the following ingredients:
- 12 large fresh oysters, shucked
- Salt and pepper, to taste
- 1/2 cup all-purpose flour
- 2 large eggs, well beaten
- 20 saltine crackers, crushed into fine crumbs
- Peanut oil, for frying
- 1/2 cup mayonnaise
- 1/2 cup sweet pickle relish
- 2 tablespoons finely chopped shallot
- 1 tablespoon freshly squeezed lemon juice
- 1 tablespoon finely chopped fresh dill, tarragon, or parsley
- Freshly ground black pepper, to taste
Gathering these ingredients ahead of time will simplify the process and help you maintain focus as you fry your oysters to perfection.
Directions
- Measure and prep all ingredients. Line a sheet pan with a cooling rack.
- Place the all-purpose flour in a shallow dish. Season the flour with salt and pepper.
- Place the beaten eggs in a separate shallow dish.
- Place the finely crushed saltine crackers in another shallow dish.
- Lightly coat the oysters in the seasoned all-purpose flour, ensuring that each oyster is covered.
- Then coat the oysters with the beaten eggs, letting any excess drip off.
- Transfer each coated oyster to the saltine cracker crumbs and ensure thorough coating.
- Place the coated oysters onto the prepared cooling rack. Repeat with remaining oysters and refrigerate until ready to fry.
- Heat 2-3 inches of peanut oil in a Dutch oven or heavy-bottomed pot to 375°F.
- Prepare the tartar sauce by whisking together mayonnaise, sweet pickle relish, finely chopped shallot, lemon juice, finely chopped herbs, and freshly ground black pepper. Adjust seasoning to taste.
- Once the oil is hot, fry oysters in batches for 1-2 minutes until golden brown. Drain on a wire rack.
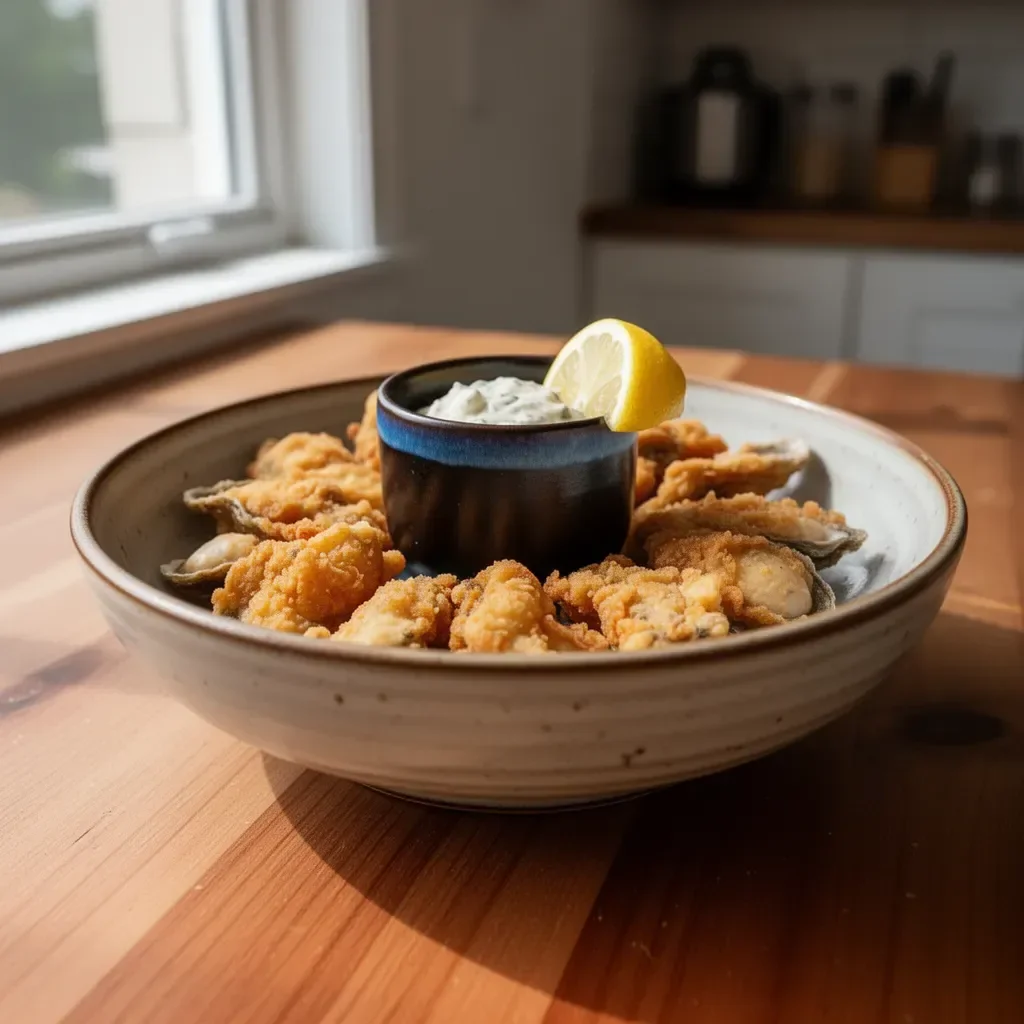
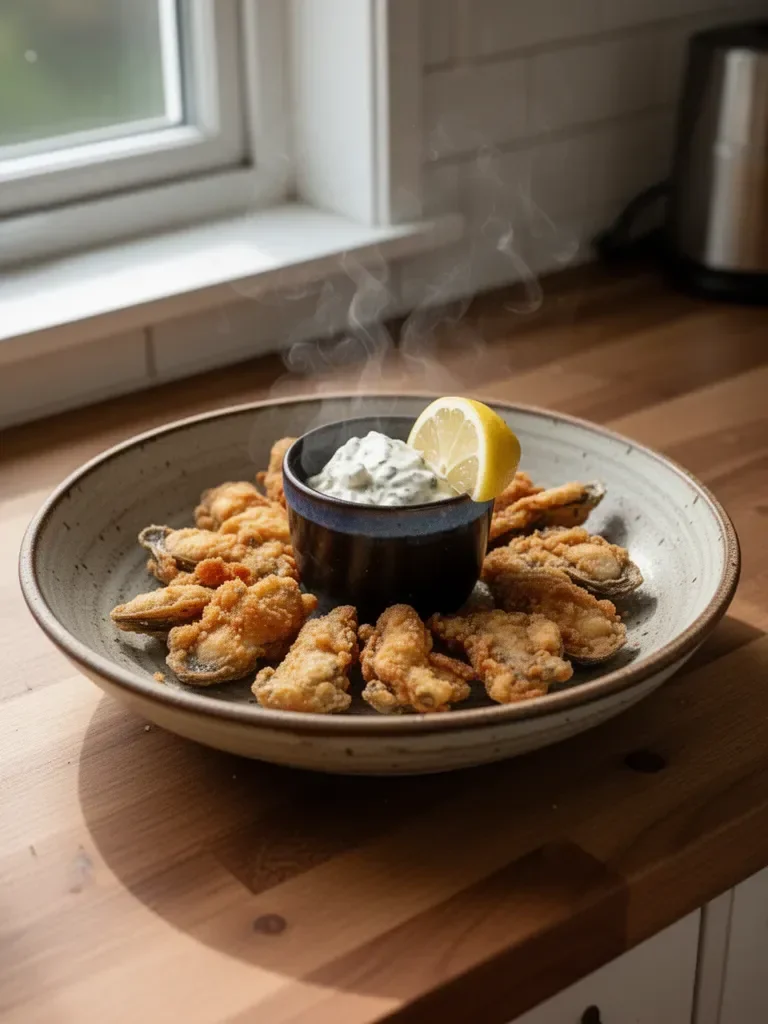
- Serve fried oysters with tartar sauce and lemon wedges. Enjoy!
Mastering Fried Oysters
Technique
Frying oysters effectively requires a few useful techniques. Pay attention to the oil temperature. Utilizing a thermometer can help you achieve the ideal heat level; aim for 375°F for proper frying. This temperature ensures a crisp exterior while cooking the oyster through without drying it out.
Coating the oysters properly will impact the final crispiness. Ensure each oyster is well-coated in flour, eggs, and cracker crumbs. This triple-layered approach provides the perfect crunch. When frying, do not overcrowd the pot, as it will lower the oil temperature and prevent a golden crisp from forming.
Tips/tricks
For optimal results, ensure your oysters are as dry as possible before coating them. Excess moisture may prevent the breading from adhering, leading to a less satisfying texture. Gently pat the oysters dry with paper towels after shucking.
If you’re looking to jazz things up, consider experimenting with spices in your flour or cracker coating. A hint of cayenne or other spices can add a flavorful kick without overwhelming the oyster’s natural taste. Enjoying the delicate brininess is key.
Refining Your Fried Oysters
Perfecting Results
Perfecting fried oysters takes practice. Remember to serve them immediately after frying for the best experience. The contrast of hot, crispy shells and tender oysters dazzles the palate. If you need to hold them for a short while, place them in a single layer on a wire rack in a warm oven to keep them crisp.
You can also adjust the cooking time depending on your desired level of crispiness. For an extra crunch, let them fry for an additional 30 seconds. Just be careful not to overcook them, as this can result in a rubbery texture.
Troubleshooting/variations
If your fried oysters aren’t turning out as crispy as you’d like, revisit your oil temperature or the coating technique. Ensuring the oil is hot enough can make all the difference. If the second batch still lacks crunchiness, changing to fresh oil helps immensely.
For variations, consider adding grated cheese to the cracker crumbs or switch up the herbs in the tartar sauce. Experimenting with flavors can lead to exciting new discoveries, ensuring that this dish never becomes dull or repetitive.
Presenting Fried Oysters
Serving/presentation
Presentation matters when serving fried oysters. Arrange them beautifully on a serving platter next to a small bowl of tartar sauce. Adding colorful garnishes, like lemon wedges and fresh herbs, elevates the visual appeal.
For an upscale touch, consider serving the oysters on a bed of sea salt or crushed ice. This not only showcases the delicacies but also adds a touch of sophistication.
Pairings/storage
Fried oysters pair deliciously with simple sides, such as coleslaw or a fresh garden salad. These sides balance the richness of the dish while providing textural contrast.
If you have leftovers, store them in an airtight container in the refrigerator. Although fried oysters are best enjoyed fresh, they can be reheated in a hot oven to retain some of their original crispiness.
The Art of Fried Oysters
Fried oysters encapsulate the joy of shared meals, evoking cherished memories of family and friendship. The process of preparing and frying them is not just about cooking; it’s about reconnecting with that delicious nostalgia.
With this recipe in hand, you can recreate those magic moments anytime. Embrace the process, enjoy the flavors, and share the love every time you serve these crispy delicacies. Whether at a festival or a cozy home meal, fried oysters will always invite smiles and good times.
Print
Fried Oysters
- Prep Time: 15 minutes
- Cook Time: 10 minutes
- Total Time: 25 minutes
- Yield: 4 servings
- Category: Appetizer
- Method: Frying
- Cuisine: Seafood
- Diet: Gluten-Free
Description
Crispy and succulent fried oysters, perfect for any gathering or family dinner, embody that comforting seaside charm.
Ingredients
- 12 large fresh oysters, shucked
- Salt and pepper, to taste
- 1/2 cup all-purpose flour
- 2 large eggs, well beaten
- 20 saltine crackers, crushed into fine crumbs
- Peanut oil, for frying
- 1/2 cup mayonnaise
- 1/2 cup sweet pickle relish
- 2 tablespoons finely chopped shallot
- 1 tablespoon freshly squeezed lemon juice
- 1 tablespoon finely chopped fresh dill, tarragon, or parsley
- Freshly ground black pepper, to taste
Instructions
- Measure and prep all ingredients. Line a sheet pan with a cooling rack.
- Place the all-purpose flour in a shallow dish. Season the flour with salt and pepper.
- Place the beaten eggs in a separate shallow dish.
- Place the finely crushed saltine crackers in another shallow dish.
- Lightly coat the oysters in the seasoned all-purpose flour, ensuring each oyster is covered.
- Then coat the oysters with the beaten eggs, letting any excess drip off.
- Transfer each coated oyster to the saltine cracker crumbs and ensure thorough coating.
- Place the coated oysters onto the prepared cooling rack. Repeat with remaining oysters and refrigerate until ready to fry.
- Heat 2-3 inches of peanut oil in a Dutch oven or heavy-bottomed pot to 375°F.
- Prepare the tartar sauce by whisking together mayonnaise, sweet pickle relish, finely chopped shallot, lemon juice, finely chopped herbs, and freshly ground black pepper. Adjust seasoning to taste.
- Once the oil is hot, fry oysters in batches for 1-2 minutes until golden brown. Drain on a wire rack.
- Serve fried oysters with tartar sauce and lemon wedges. Enjoy!
Notes
Pat the oysters dry before coating for better adherence of the breading. Experiment with spices in the flour or cracker coating for added flavor.