📑 Table of Contents ▶
- Mochiko Chicken Fundamentals
- Fundamentals
- Preparation and Setup
- Directions
- Technique for Mochiko Chicken
- Technique
- Tips and Tricks
- Perfecting Results for Mochiko Chicken
- Perfecting Results
- Troubleshooting and Variations
- Serving and Presentation of Mochiko Chicken
- Serving and Presentation
- Pairings and Storage
- Conclusion
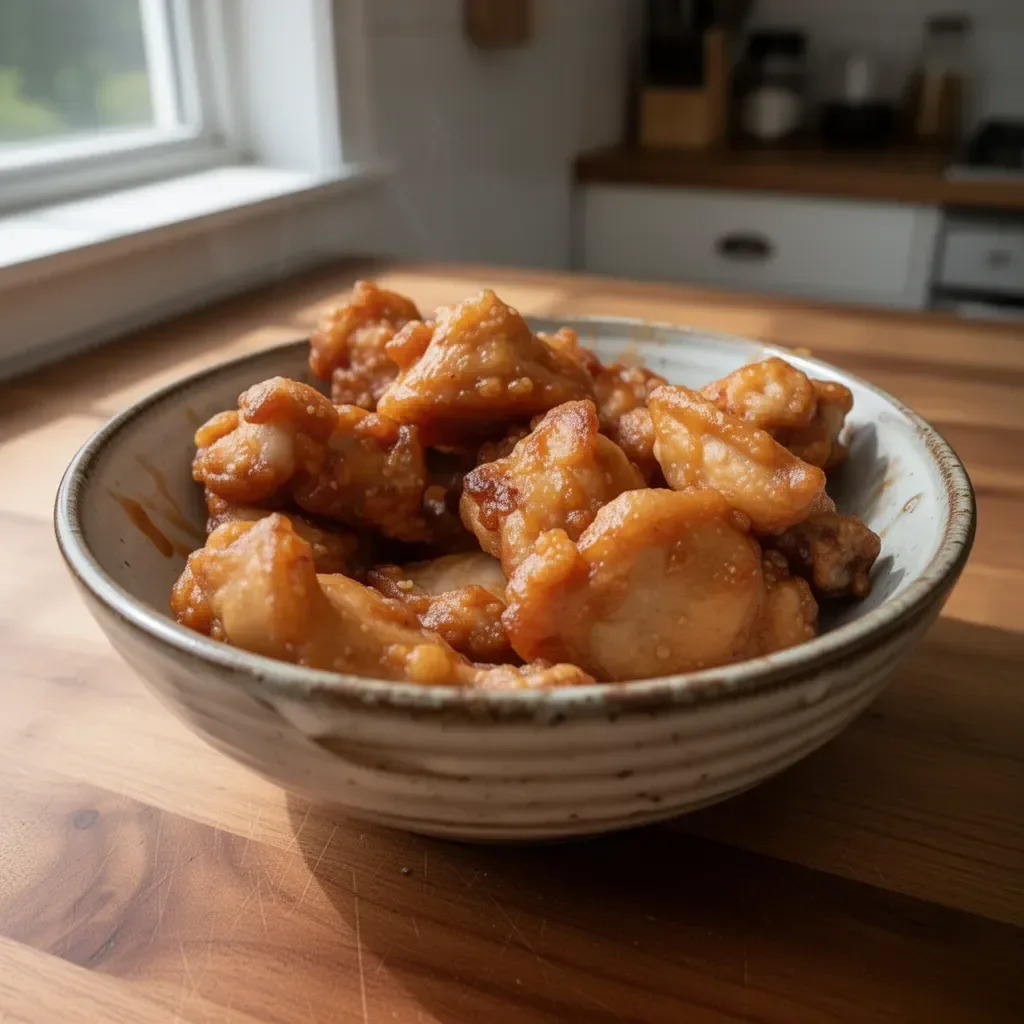
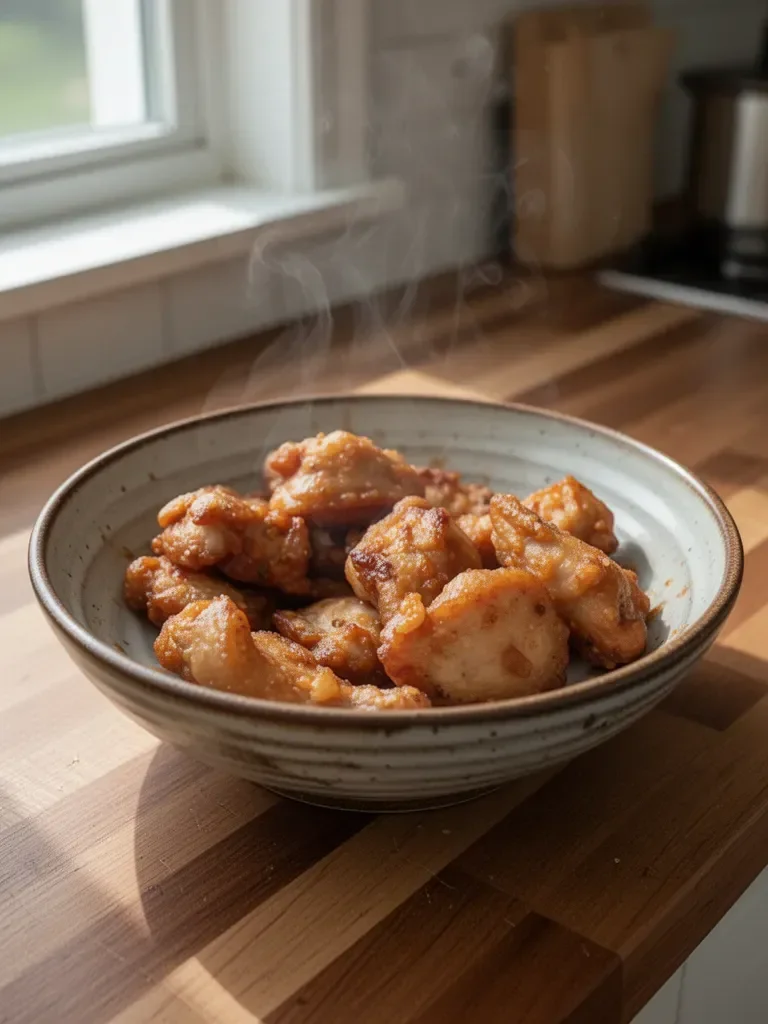
Mochiko Chicken
Discovering the magic of Mochiko chicken transformed my approach to weeknight dinners. The crispy, flavorful texture brings joy to every bite and keeps my family excited for meal time. This dish not only satisfies those cravings for something crispy but also skips the guilt associated with deep-fried foods. The versatility of Mochiko chicken shines through whether served over rice or alongside a fresh salad.
The blend of flavors in this recipe truly encapsulates the essence of comfort food. When preparing Mochiko chicken, the vibrant garlic and soy sauce beautifully mingle with the oil, creating a savory experience. Each piece of chicken becomes a delicious morsel, crisp on the outside and tender within. As a busy home cook, you’ll appreciate how the marination process enhances every bit of flavor.
Mochiko chicken brings friends and family together around the dinner table. It’s not just about the food; it’s the experience of cooking and sharing. Each step allows for creativity, from preparing the marinade to choosing the perfect side dishes. Get ready to dive into an unforgettable meal that transforms ordinary chicken into a flavor-packed delight.
Mochiko Chicken Fundamentals
Fundamentals
Mochiko chicken offers a unique spin on traditional fried chicken. The essence of this dish lies in the use of mochiko flour, which provides that signature crispiness we all crave. This special flour, made from sweet rice, has a slightly sticky texture that helps create a delightful outer layer when fried. Combined with cornstarch, it ensures a crunch that keeps you coming back for more.
Understanding the principles behind Mochiko chicken also involves recognizing the ingredients’ roles. The soy sauce not only tenderizes the chicken but also infuses it with rich umami flavor. The garlic provides aromatic notes that uplift the overall profile. The sugar beautifully balances the saltiness and adds a hint of caramelization during frying, resulting in a visually appealing golden crust.
Remembering the fundamental techniques makes the cooking process smoother and the final dish so much more enjoyable. With each step, you’ll see how small details create large flavor impacts. Let’s explore how to prepare this scrumptious meal step by step.
Preparation and Setup
Preparation begins with chopping the chicken thighs into bite-sized pieces. Aim for uniformity to ensure even cooking. Next, gather all the ingredients: mochiko flour, cornstarch, sugar, soy sauce, eggs, salt, minced garlic, and optional green onions. Make sure to have a large bowl on hand for mixing everything together.
After preparing the chicken, mix the dry ingredients in the bowl first. Combine the mochiko flour, cornstarch, sugar, and salt. This blend forms the foundation of your crispy coating. Then, add the minced garlic and, if desired, the green onions for added freshness. In a separate bowl, whisk the eggs with the soy sauce until well combined.
Once you have the dry and wet mixtures ready, combine them with the chopped chicken. Ensure each piece becomes fully coated in the marinade. Cover the bowl with plastic wrap and refrigerate for at least 8 hours or, if time allows, overnight. This marination process elevates the flavors, allowing the chicken to absorb everything beautifully.
Ingredients
To make delicious Mochiko chicken, gather the following ingredients:
- 2 pounds boneless, skinless chicken thighs
- 1/4 cup mochiko flour
- 1/4 cup cornstarch
- 1/4 cup sugar
- 1/4 cup soy sauce
- 2 eggs
- 1 teaspoon salt
- 6 cloves garlic, minced
- 1/4 cup green onions, chopped (optional)
These ingredients shine on their own, but together they create a harmony of flavors and textures that is hard to resist. The chicken thighs offer moisture and tenderness, making them the perfect choice for frying. The use of essential pantry staples ensures that you can whip up this dish whenever the craving strikes.
Directions
Follow these simple directions to create your Mochiko chicken:
- Chop the chicken into 1-inch, bite-sized pieces.
- Mix all the other ingredients (mochiko flour, cornstarch, sugar, soy sauce, eggs, salt, garlic, and optional green onions) together in a large bowl.
- Add the chicken to the bowl, ensuring each piece gets coated in the marinade.
- Cover the bowl and refrigerate for at least 8 hours or overnight to allow the flavors to meld.
- Fill a small pot with vegetable oil, about 1 inch high. Heat the oil over medium-high heat.
- Once the oil is hot, carefully add the marinated chicken pieces. Fry until they are crisp and golden brown, which takes about 6 minutes.
- Remove the chicken and let it drain on a paper towel. Serve with rice or your favorite side dish.
Technique for Mochiko Chicken
Technique
Perfecting your Mochiko chicken does require some attention to detail. Frying at the right temperature is crucial for achieving the ideal crispiness while preventing oil absorption. Use a thermometer to check the oil temperature, which should be around 350°F. If you don’t have a thermometer, you can drop in a small piece of bread—if it sizzles and turns golden in about 30 seconds, the oil is ready.
Frying in small batches allows for better temperature control and results in even cooking. Overcrowding the pan creates temperature fluctuations, preventing that delectable crunch. Aim for batches of about 4-5 pieces.
Another technique to consider is the resting time. Allowing the fried chicken to rest on paper towels not only helps drain excess oil but also makes the coating adhere better, keeping it crispy for longer.
Tips and Tricks
A few handy tips can enhance your Mochiko chicken experience. To elevate its flavor, try adding spices to the flour mix. Paprika or a pinch of cayenne can introduce a delightful warmth to the dish. If you’re short on time, a quick 30-minute marinade still delivers a flavorful chicken, but longer marination will yield better results.
Additionally, if you prefer baking over frying, you can coat the chicken with the flour mixture and bake it in a preheated oven at 425°F until crispy and golden. Keep an eye on them to ensure even cooking and check for doneness.
Remember that enjoying the cooking process is just as important as the final dish. Make it a fun family activity by involving everyone in the preparation. Watch the excitement grow as everyone gathers around the table to enjoy the freshly made Mochiko chicken.
Perfecting Results for Mochiko Chicken
Perfecting Results
To achieve perfect Mochiko chicken, focus on the cooking methods used. If frying, it’s crucial to monitor the color and texture carefully. A golden brown outside should indicate that the chicken is ready. The meat should be fully cooked but retain its moisture. Testing a piece for doneness will ensure that you serve perfectly cooked chicken with a wonderfully crispy coating.
The seasoning also plays a significant role in elevating the flavors. The sugar and soy sauce blend beautifully, offering a punch of flavor in every bite. Adjust these elements based on personal preference—a bit more sugar can enhance caramelization, while a dash more soy sauce can yield a saltier flavor profile.
Consider using different types of oil for frying. While vegetable oil works great, oils with high smoke points, like canola or peanut oil, can enhance the frying experience, offering flavors that complement the chicken nicely.
Troubleshooting and Variations
Sometimes, you might face challenges during the cooking process, but that’s perfectly normal. If your chicken doesn’t brown as expected, it could be due to the oil temperature. Always ensure your oil is adequately heated before adding the chicken. If the coating falls off, ensure complete coverage during marination, and be gentle when frying.
If you’re feeling adventurous, experimenting with variations can yield exciting results. You could add spices, herbs, or even citrus zest to the marinade for a twist. Adjusting the type of chicken can also diversify your meals—try using chicken breasts for a leaner option or applying the same method to fish for a lighter dish. Each variation allows for creativity while still delivering delicious results.
Serving and Presentation of Mochiko Chicken
Serving and Presentation
Serving Mochiko chicken can be an artistic endeavor. Arrange the crispy pieces on a colorful platter alongside fresh vegetables, like carrot sticks or a refreshing cucumber salad. The crunch of these veggies complements the texture of the chicken beautifully. You can garnish with additional chopped green onions for a pop of color and added flavor.
Drizzling a little extra soy sauce or serving with a sweet chili sauce can enhance the dining experience. The contrasting flavors create a balanced plate that’s visually appealing and satisfying.
Pairings and Storage
Mochiko chicken pairs wonderfully with several complementary side dishes. Steamed rice serves as the perfect canvas to soak up the flavors, while stir-fried veggies add freshness and color to the plate. A simple side salad can provide a nice contrast, balancing out the richness of the chicken.
Storing any leftovers, if they exist, allows you to enjoy this dish later. Place leftover chicken in an airtight container and store it in the refrigerator for up to three days. Reheating can be done in the oven to preserve crispiness—just pop them at 350°F for about 10-15 minutes until heated through.
Creating Mochiko chicken allows you to showcase flavors and textures that appeal to everyone at the table. Preparing this dish infuses routine meals with excitement and anticipation, ensuring Mochoiko chicken becomes a favorite in your home.
Conclusion
Mochiko chicken stands out as a delightful fusion of flavors and textures that transforms an ordinary dinner into a feast. By following simple steps and techniques, you can create a crispy, mouthwatering dish that your family will love. With its unique blend of ingredients, Mochiko chicken gives you the chance to enhance cooking traditions and enjoy incredible homemade meals. Dive into the adventure of cooking and let Mochiko chicken become a staple in your culinary repertoire.
Print
Mochiko Chicken
- Prep Time: 15 minutes
- Cook Time: 6 minutes
- Total Time: 495 minutes
- Yield: 4 servings
- Category: Main Course
- Method: Frying
- Cuisine: Japanese
- Diet: Gluten-Free
Description
Crispy and flavorful Mochiko chicken is a guilt-free alternative to deep-fried dishes, perfect for weeknight dinners.
Ingredients
- 2 pounds boneless, skinless chicken thighs
- 1/4 cup mochiko flour
- 1/4 cup cornstarch
- 1/4 cup sugar
- 1/4 cup soy sauce
- 2 eggs
- 1 teaspoon salt
- 6 cloves garlic, minced
- 1/4 cup green onions, chopped (optional)
Instructions
- Chop the chicken into 1-inch, bite-sized pieces.
- Mix all the other ingredients (mochiko flour, cornstarch, sugar, soy sauce, eggs, salt, garlic, and optional green onions) together in a large bowl.
- Add the chicken to the bowl, ensuring each piece gets coated in the marinade.
- Cover the bowl and refrigerate for at least 480 minutes or overnight to allow the flavors to meld.
- Fill a small pot with vegetable oil, about 1 inch high. Heat the oil over medium-high heat.
- Once the oil is hot, carefully add the marinated chicken pieces. Fry until they are crisp and golden brown, which takes about 6 minutes.
- Remove the chicken and let it drain on a paper towel. Serve with rice or your favorite side dish.
Notes
For added flavor, consider incorporating spices like paprika or cayenne into the flour mixture. Baking is an alternative method for cooking if preferred.