📑 Table of Contents ▶
Crunchy Roll Sushi
Creating crunchy roll sushi fills the kitchen with excitement and delightful aromas. The blend of creamy avocado, crisp cucumber, and the crunchy texture of tempura flakes creates a perfect balance that always impresses. As a busy home cook, finding a way to enjoy sushi without relying on takeout became essential.
Sushi has always felt like a journey, one that brings friends and family together. The fun starts with a bamboo mat, where you bring your creativity to life by rolling your unique creations. I’ve often found that making sushi at home allows for endless customization to suit all palates, especially when introducing ingredients that please everyone at the table. The crunch you achieve with tempura flakes and panko breadcrumbs makes these rolls extra special.
Crunchy rolls are not just satisfying to eat but also visually appealing, making them a showstopper at any gathering. The best part? You can control the ingredients, ensuring a healthier option than store-bought versions. Every bite of crunchy roll sushi is full of flavor, making it a go-to recipe in my kitchen.
Crunchy Roll Sushi Essentials
Fundamentals
Understanding the basic components of crunchy roll sushi lays the groundwork for making your own. Sushi rice forms the heart of these delicious rolls, providing a sticky bed that holds everything together. Rice vinegar gives the rice its signature tanginess, while sugar and salt help balance the flavors.
Nori seaweed sheets create a perfect vessel, encasing the rich ingredients inside. Whether you’re a beginner or an experienced chef, knowing how to roll sushi effectively presents an enjoyable challenge. The inclusion of freshly sliced avocado and crisp cucumber adds freshness, while tempura flakes and panko breadcrumbs ensure a satisfying crunch in every bite.
A few tools streamline the process. A bamboo sushi mat allows for easy rolling, while a sharp knife ensures clean cuts once you’re ready to slice into your creations. A well-prepared workspace with all your ingredients laid out also sets the stage for an enjoyable cooking experience.
Preparation/Setup
Start with the sushi rice. Rinse it thoroughly under cold water until the water runs clear, removing excess starch. This step is crucial to achieve the right texture. Soak the rice for thirty minutes. This allows it to absorb water, ensuring even cooking.
Cook the rice according to package instructions until tender. While your rice cooks, combine rice vinegar, sugar, and salt in a bowl. Stir until dissolved, creating a sweet and tangy mixture that enhances the rice’s flavor.
After the rice cools slightly, mix it carefully with the vinegar combination, folding gently to avoid mashing the grains. Simultaneously, prepare the crunchy layer by mixing panko breadcrumbs with vegetable oil; this mixture will create that desired golden, crispy coating.
Now you are ready to roll! Lay down a nori sheet on your bamboo mat, shiny side facing down.
Ingredients
- 2 cups sushi rice
- 1/3 cup rice vinegar
- 2 tablespoons sugar
- 1 teaspoon salt
- 4 nori seaweed sheets
- 1 cucumber (julienned)
- 1 avocado (sliced)
- 1/2 cup tempura flakes
- 1 cup panko breadcrumbs
- 2 tablespoons vegetable oil
- 1 tablespoon soy sauce
- 1 teaspoon maple syrup or agave nectar
- Soy sauce and pickled ginger for serving
Directions
- Prepare the sushi rice by rinsing and soaking it for thirty minutes. Cook according to package instructions.
- Combine rice vinegar, sugar, and salt in a bowl, mixing until dissolved.
- Once the rice has cooled slightly, gently combine it with the rice vinegar mixture, folding it carefully.
- Prepare the crunchy crust by mixing the panko breadcrumbs with vegetable oil to create a golden, crispy texture.
- Lay out a nori sheet on a bamboo mat, shiny side down. Wet your hands and spread an even layer of sushi rice over the nori, leaving about an inch at the top edge.
- Add a line of julienned cucumber and avocado in the center of the rice.
- Sprinkle a generous amount of tempura flakes over the vegetables.
- Carefully roll the sushi away from you, using the mat to guide it. Press gently but firmly as you go.
- Seal the edge with a bit of water.
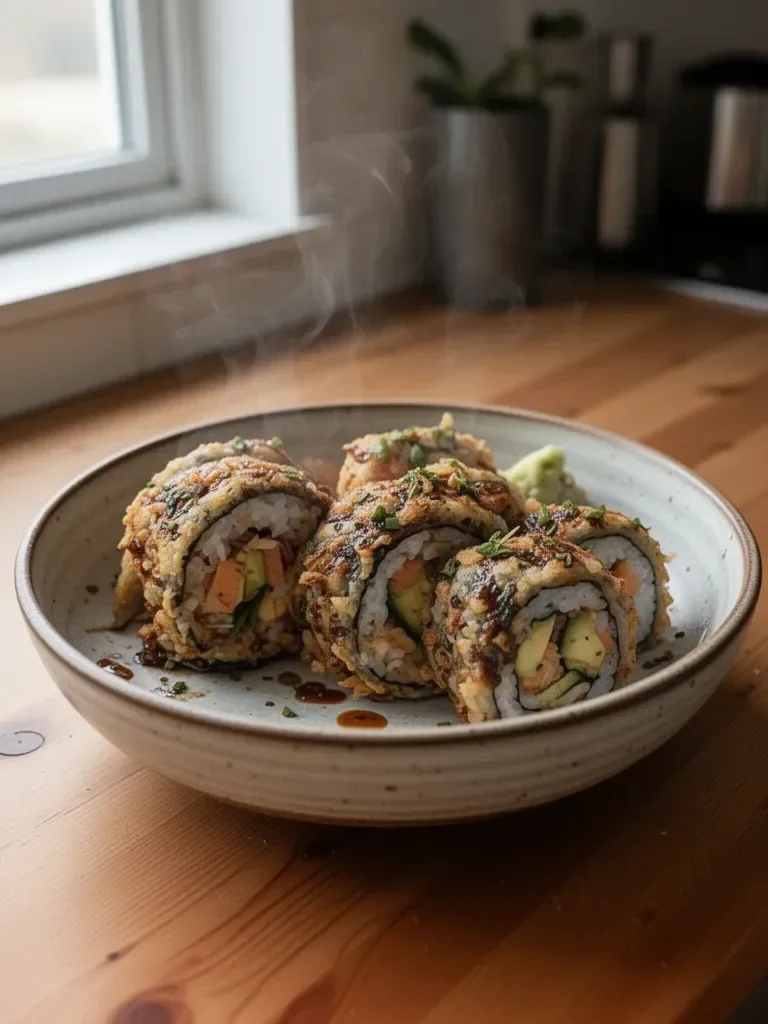
- Coat the outside of the roll with the panko mixture and pan-fry in a skillet over medium heat until golden brown.
- Slice the roll into bite-sized pieces.
Crunchy Roll Techniques
Technique
Perfecting the art of sushi rolling requires practice and patience. Working with sushi rice can feel daunting, but achieving the right texture is key. Sticky rice adheres well to nori and holds the roll together. After mastering the rice, focus on rolling technique.
Keep ingredients harmonized within the roll. Too much filling can lead to a messy outcome. Position the cucumber and avocado in a straight line, ensuring they sit comfortably without bulging. Use the sushi mat to help you shape the roll; this process gives you control over tension as you roll.
When you reach the sealing edge of the nori, moisten it with a little water to ensure it sticks. This technique helps form a secure closure, preventing the roll from coming undone while frying.
Tips/Tricks
Experimenting with the crunch factor enhances your sushi experience. You can spice things up by adding a drizzle of flavorful sauces or even spicy mayo for a kick. Personalize each roll by incorporating different vegetables or protein.
Practice your slicing technique to achieve uniform pieces. A sharp, wet knife makes for clean cuts. Use a gentle sawing motion to avoid squishing the roll. Presentation counts, so take your time arranging the sushi beautifully on a platter, making it visually appealing.
Buffered textures and contrasting flavors play beautifully in every bite. Adding roasted sesame seeds or spicy tuna inside your roll adds extra flair.
Perfecting Your Crunchy Rolls
Perfecting Results
Achieving the ideal crunchy roll sushi involves understanding the balance of textures and flavors. Ensure your tempura flakes are fresh for maximum crispiness. Once fried, the panko crust should remain light and crunchy.
If you find your rolls too soft or falling apart, review your rice consistency. Overcooked rice can lead to mushiness, while undercooked rice may not roll successfully. Finding the sweet spot takes practice but leads to scrumptious results.
Experiment with ingredient pairings. Try crispy vegetables or richer fillings like cream cheese, which can bring luxurious textures to your rolls.
Troubleshooting/Variations
Should you experience difficulties, you’re not alone. If your rolls are too tight, try using less filling in future attempts. Avoid the urge to overstuff to maintain that perfect bite.
On the other hand, if you find them too loose, ensure you pack the fillings more securely and evenly distribute them across the rice.
Explore variations in presentation. You can cut the rolls into thicker pieces or create a sushi bowl by placing all ingredients in a bowl rather than rolling them. This style caters to those who prefer a deconstructed dish.
Serving Crunchy Roll Sushi
Serving/Presentation
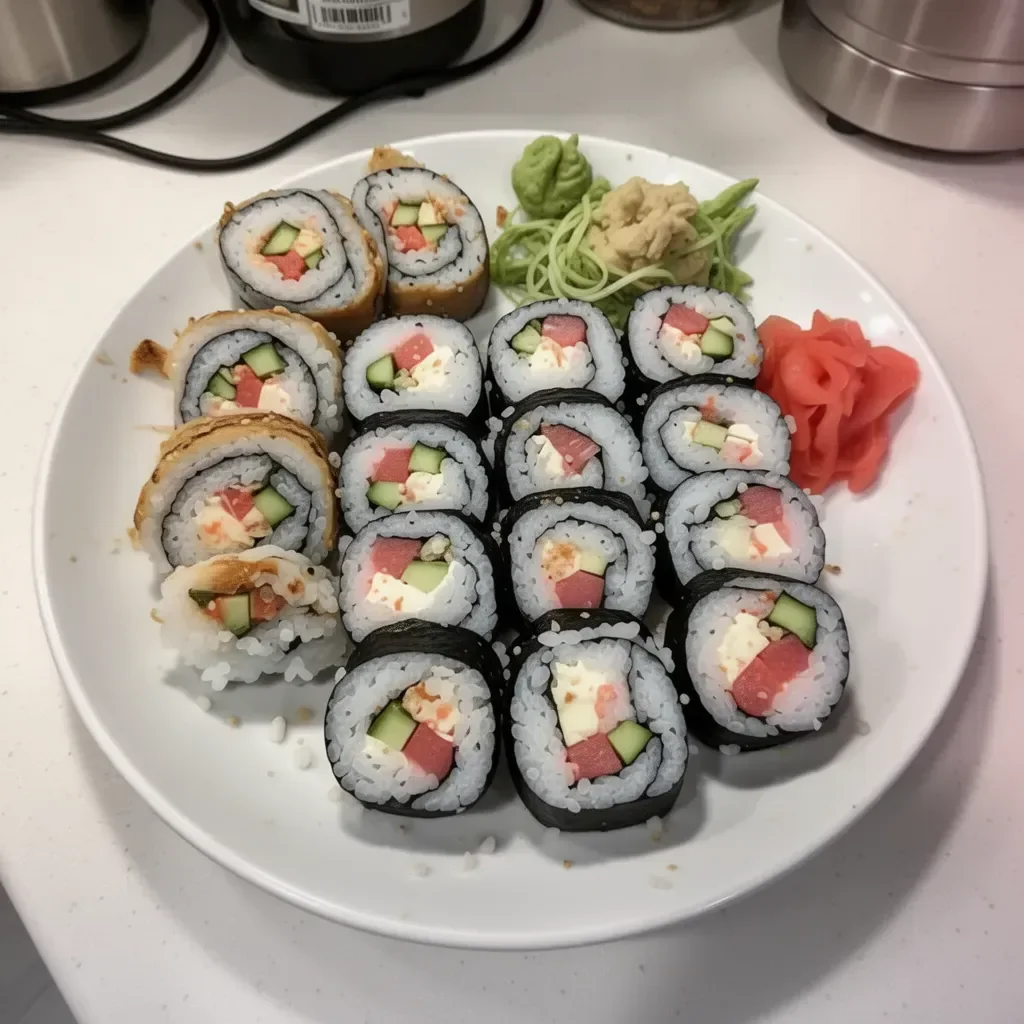
Presenting your crunchy roll sushi beautifully elevates your dining experience. Serve the rolls neatly sliced, displaying the colorful ingredients within. An attractive plate or wooden board can make your sushi stand out.
Pair the rolls with small bowls of soy sauce for dipping. Adding a touch of wasabi and pickled ginger brings a traditional touch. The beautiful presentation of vibrant colors in the sushi rolls makes for an eye-catching meal.
Pairings/Storage
These delicious rolls pair excellently with refreshing sides like cucumber salad or edamame. Fresh fruit complements the meal, adding a sweet note.
Leftover sushi can be stored for a day in an airtight container in the refrigerator. However, freshly made sushi tastes best. The combination of crunch and flavor is at its prime just after making.
For those looking to mix things up, consider creating sushi bowls with similar ingredients for a quick lunch option. This method allows for easy customization while maintaining that satisfying flavor we all love.
Creating crunchy roll sushi opens up a world of possibilities in your kitchen. Embrace the process, enjoy the journey, and savor every crunchy bite you make.
Print
Crunchy Roll Sushi
- Prep Time: 30 minutes
- Cook Time: 20 minutes
- Total Time: 50 minutes
- Yield: 4 servings
- Category: Main Course
- Method: Baking
- Cuisine: Japanese
- Diet: Vegetarian
Description
Delightfully crunchy roll sushi made with creamy avocado, crisp cucumber, and tempura flakes, perfect for home cooks looking to enjoy sushi.
Ingredients
- 2 cups sushi rice
- 1/3 cup rice vinegar
- 2 tablespoons sugar
- 1 teaspoon salt
- 4 nori seaweed sheets
- 1 cucumber (julienned)
- 1 avocado (sliced)
- 1/2 cup tempura flakes
- 1 cup panko breadcrumbs
- 2 tablespoons vegetable oil
- 1 tablespoon soy sauce
- 1 teaspoon maple syrup or agave nectar
- Soy sauce and pickled ginger for serving
Instructions
- Prepare the sushi rice by rinsing and soaking it for thirty minutes. Cook according to package instructions.
- Combine rice vinegar, sugar, and salt in a bowl, mixing until dissolved.
- Once the rice has cooled slightly, gently combine it with the rice vinegar mixture, folding it carefully.
- Prepare the crunchy crust by mixing the panko breadcrumbs with vegetable oil to create a golden, crispy texture.
- Lay out a nori sheet on a bamboo mat, shiny side down. Wet your hands and spread an even layer of sushi rice over the nori, leaving about an inch at the top edge.
- Add a line of julienned cucumber and avocado in the center of the rice.
- Sprinkle a generous amount of tempura flakes over the vegetables.
- Carefully roll the sushi away from you, using the mat to guide it. Press gently but firmly as you go.
- Seal the edge with a bit of water.
- Coat the outside of the roll with the panko mixture and pan-fry in a skillet over medium heat until golden brown.
- Slice the roll into bite-sized pieces.
Notes
Perfect the rolling technique with practice. A sharp knife is essential for clean slices.